Amazing Penguin Nail Art Tutorial With Detailed Steps & Pictures
It may seem quite difficult to draw penguins on your nails but in reality, it is very easy to do. You will not need any special tools to create some adorable penguins on your nails. So, next time when you have some spare time in your hands, you can give this nail art a try. You can do this nail art on small nails as well. Since penguins will be drawn using mostly black and white color, you can sport this nail art with any of your black or white outfits. You can wear this to your college or even when you are out shopping with your friends. Now, let’s see how to do penguin nail art.
Things Required:
- Base coat (optional)
- White nail polish
- Black nail polish
- Light blue nail polish
- Skin colored nail polish (optional)
- Transparent polish
- A thin nail art brush
- Acrylic colors in sea black, white and orange
- 3 tiny rhinestones
- A pair of tweezers
- A transparent top coat
Penguin Nail Art Tutorial
Step 1:
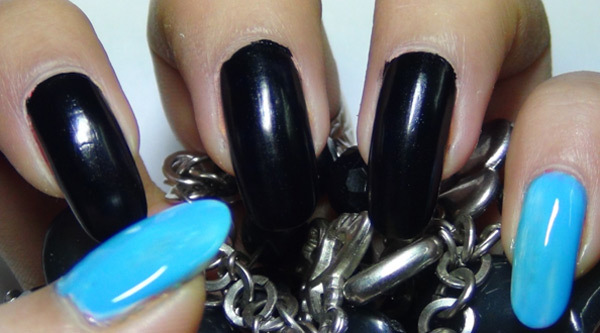
Start with a base coat as it protects your nails from the harmful effects of acrylic paint and also, from chipping and breaking. When it dries, use two layers of a skin colored nail polish. Let it dry completely and then paint the first, second and the third finger nails with black nail polish. Use light blue nail polish on the thumb and the tiny finger. Apply two coats of polish to each nail to make the base more opaque.
Step 2:
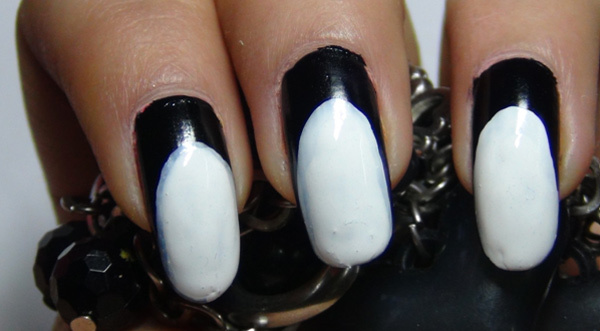
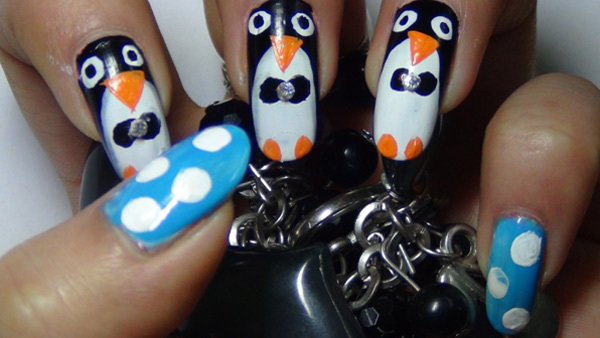
Take white acrylic color on a palette and draw up an egg shape for the three fingers like shown below.
Step 3:
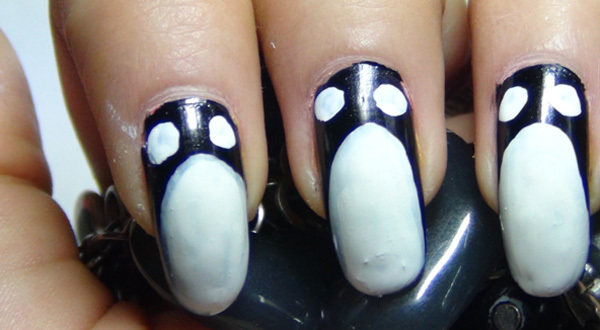
Take your dotting tool and make two dots for each of the three nails which will become the eye of the penguins. You can refer the picture below.
Step 4:
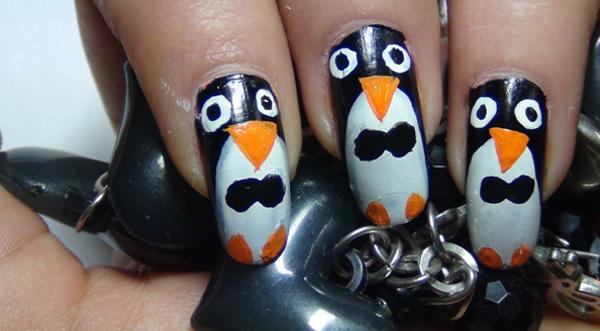
Use orange acrylic color to paint the triangular shape for the beaks of the penguins. Make sure the shape starts from the black area and extends to the white egg shape zone. Make circular shapes with your nail art brush or dotting tool to represent the feet of the penguins. Refer to the picture below.
Step 5:
Now, take your small dotting tool or a toothpick and make the eyes of the penguins with black dots. You can use black nail polish or black acrylic paint for this. Now, take your nail art brush and black acrylic paint. Use this to make a bow for each penguin. An easy way to make a bow is to draw a horizontal ‘8’ (eight) shape. You can also draw a bow by joining two dots. Refer to the picture below.
Step 6:
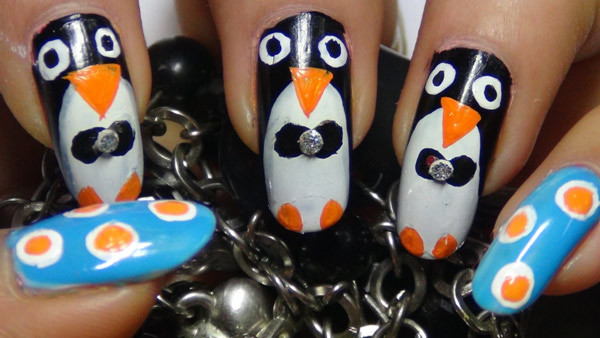
Now, take a small amount of transparent polish and put it at the center of the bows. Take a pair of tweezers and put a tiny rhinestone in that place. Now, let us move to the blue nails. Take a big dotting tool and draw some big polka dots for the two blue nails. You can use white acrylic paint or white nail polish for this.
Step 7:
Now, take a smaller dotting tool or use the blunt end of a toothpick to make smaller dots inside the big polka dots. I have used orange color here. However, you can use any other color of your choice to make this nail art design even more gorgeous and colorful. When this is done, let it dry completely. After it’s properly dried, use two nice layers of a quality top coat.

No comments:
Post a Comment